more plumbing advice from your Hastings Plumber…
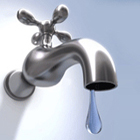
HOW TO FIX A DRIPPING TAP OR FAUCET
Generally there are two types of valves used in domestic taps and it is quite easy to distinguish which type of valve you have…
1) STANDARD VALVE – you can turn the head through more than 90 degrees.
A standard valve uses a rubber washer to hold back the water. As you turn the tap head the valve lifts off its seat and allows water to pass through the body of the tap. The more you turn it, the more the water flows.
After a time the rubber washer degenerates and that is why the tap will become more and more difficult to turn off, and so it starts to drip.
To replace the washer follow these guidelines…
- Firstly you need to isolate the water to the tap. Usually you will see an isolating valve on the pipe work just under the tap, in which case it is easy to isolate. If not, then you may need to turn the water off to your property and drain down the supply to that tap. You can not change the washer until you have stopped the water going to it!
- Next you need to remove the tap head. You may need to carefully lift out a plastic grommet, usually red or blue to denote hot or cold, in order to access the screw beneath. Take out that screw and then lift off the head. In many cases the head can be difficult to release, so be careful not to apply too much pressure or you may break the appliance or tap!
- Once you have removed the tap head you can see the valve. You will need to use a suitable spanner to turn the valve out of the body of the tap. Before you start applying pressure to the valve, you need to support the tap so that it does not move as you try to unscrew the valve. One way to do this is to use a hollow metal tube, about 20cm long to slide over the spout of your tap to give you leverage. It needs to be a snug fit but first you should wrap the spout with a cloth so as not to scratch it.
- Now you are ready to unscrew the tap valve from the body. Turn the valve anticlockwise whist appling equal and opposite force to your extension tube. This will stop the tap from trying to turn in the appliance. Remember to take the valve out slowly, this is your last chance to avoided a flood if you have not isolated the tap properly!
- Once the valve is out of the tap you will see the rubber washer. Remove it and replace with a new washer of the same size. Now all you have to do refit the valve in the reverse order.
2) QUARTER TURN valve – you can only turn the tap head 90 degrees.
This type of valve can be a problem and generally they are not serviceable. Unlike a standard valve where you can simply replace a rubber washer, this valve should be replaced completely.
You need to find the right replacement that fits the tap AND the tap head! Often the shaft that comes out of the valve has splines, but different manufacturers have a different number of splines, so if you get the wrong one then your existing tap head will not fit. Also, the valve may have a screw thread drilled down the top of the splined shaft so you will need to make sure that the screw that you took out to remove the old head will fit the new valve.
OK, so now you have overcome these difficulties you can start to replace the valve. Just follow steps 1 to 4 shown above and all should be well!
GOOD LUCK 🙂
PLEASE NOTE. These instructions are intended as a guide only. I can’t see the particular job you may be attempting so I can not give you definitive instructions. You undertake the work at your own risk and I accept no responsibility for the accuracy of these guidelines.

